Camper Remodel Diary Day 3 on our Jayco pop up camper. Tossing out the cushions, buying new material, cleaning, and starting on the new countertops.
Day 3: Removing the camper cushions and buying new fabric. Deep cleaning the camper, getting the bugs out, and our secret weapon. Plus, get a sneak peek at the new countertops!
As an Amazon Associate I receive earnings from qualifying purchases. I take great care to hand-select items based off my own experience, high praise reviews, and previously purchased or recommended items. Read our Privacy Policy here.
Pop Up Camper Remodel Diary Day 3
If you’re new here, start with Day 1 of our 1999 Jayco Pop Up Camper Remodel Diary!
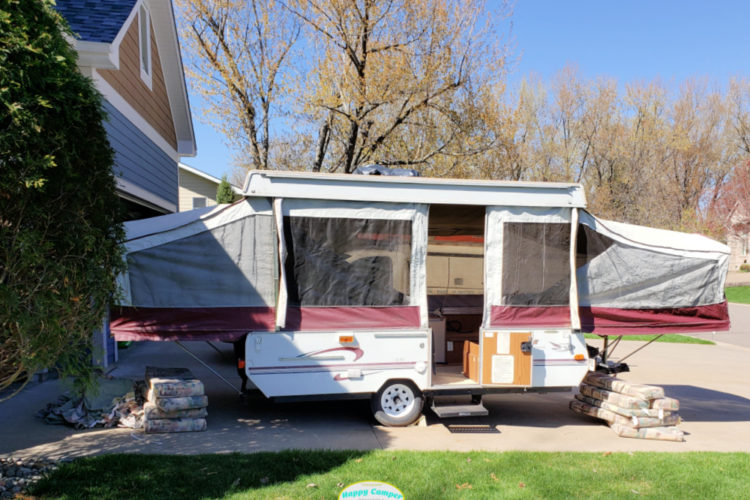
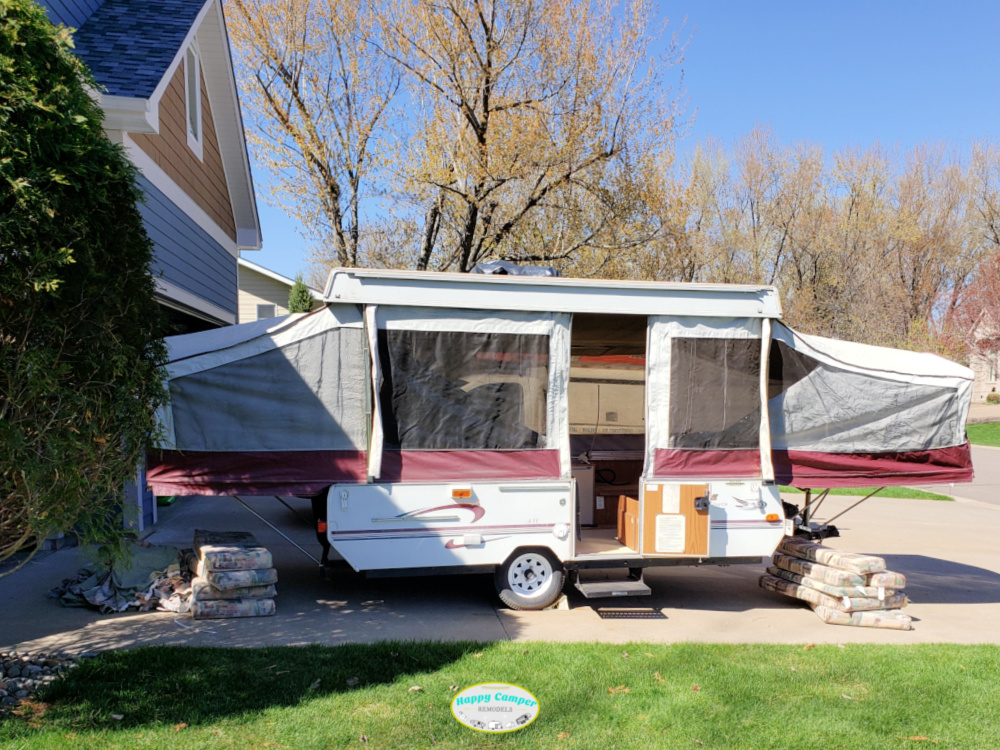
After getting a good look and having the camper popped up, we were ready to keep the momentum going on Day 3!
However, Day 3 was about a week later since we had spent some time on the cabin project. If you want to see more about that, be sure to follow our Exploring Domesticity Instagram account, and while you’re there follow this account on Instagram!
Tossing out the cushions and buying material
All of the cushion covers in this camper are in rough shape.
Not only is the material dated and ugly, but most of the zipper seams are ripped out anyway.
I can’t wait to change them out!
In a dramatic fashion, Little Guy and I tossed those cushions right out of the camper.
I will end up removing the covers, freshening up the cushions and recovering them in the future, but today wasn’t the day. So, after that dramatic show of throwing them out, we ultimately dragged them back in at the end of the day. Womp, womp…
The good news with these cushions is that they aren’t as smelly as our first pop up camper. We had to work some magic on those and to get the general musty smell out of that camper.
This one isn’t too bad, so that’s a win!
New Cushion Material
This is something I’m really excited about! In order to keep an eye on the budget, and since fabric can be so expensive, we’re using canvas drop cloth for this project.
After a bit of research and price checking, we found the 9×12 drop cloth for $17.99 at Menards to be the best deal. This set of 2 9×12 drop cloths on Amazon is about the same price.
We bought 3 just to be safe, but (spoiler alert) all 11 cushions were covered using just 2 so we were able to return one and the whole project cost $36 dollars. That’s a steal for that much fabric!
Also Read: Pop Up Camper Parts Everyone is Buying
Taking care of the canvas
Another small thing we were excited to do was cut the fishing line that “sewed” the canvas together.
It was tough to snip that stuff out with some tiny kids scissors, but it looks like there aren’t any major rips in the canvas or zipper.
To fix this, we’ll need to get a new zipper and see if we can get this to close up. I bought this zipper repair kit from Amazon, so fingers crossed!
Ultimately, we need to mess with the lift system to make sure both sides of the camper are rising evenly, which we looked into a bit on our Camper Remodel Diary Day 2.

Cleaning out the bugs
In a pop up camper, a lot of bugs can get stuck between the screen and the canvas. So, one of the first steps – and one of the easiest – in a camper remodel is cleaning out the bugs.
This was our biggest project of the day.
I had such a great helper to clean all the bugs from between the screen and canvas. He used the vacuum to get down between and suck them out.
I have to tell you about our Milwaukee vacuum. During one of our other projects, my husband said we needed one and went right out and bought it.
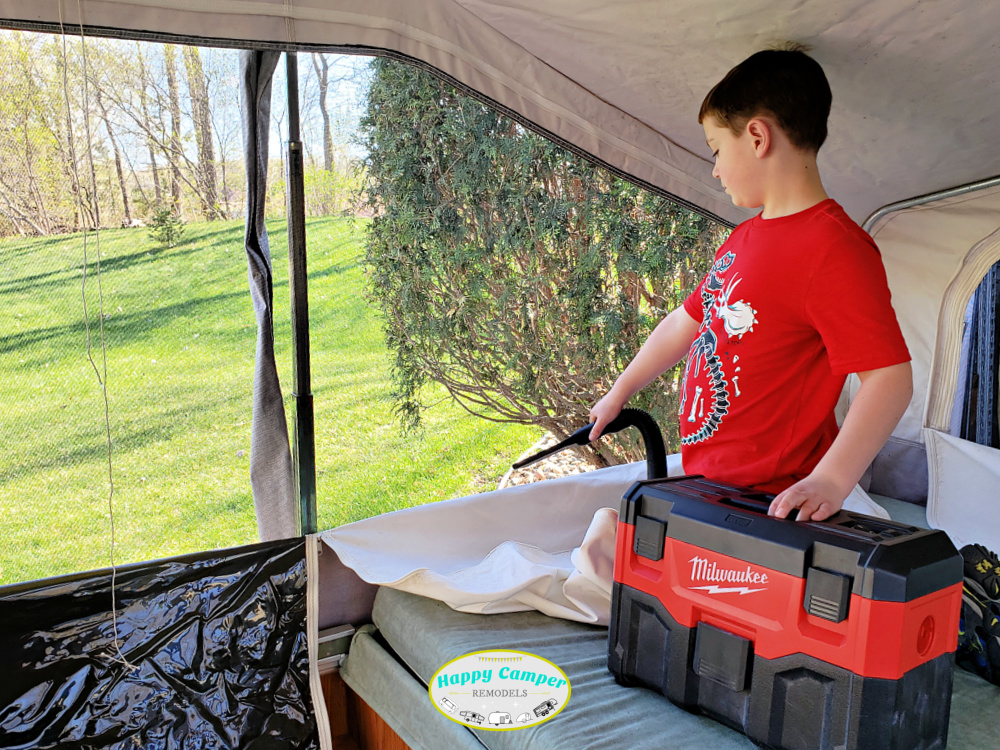
I was a little miffed because we have a couple shop vacs, a vacuum for the camper, and even two cordless Dysons that I believe can do anything.
However, I have to say, this vacuum has been used a lot!
If you already have Milwaukee tools, it’s great because it takes the same batteries. It’s very compact and store the two attachments right inside, and it’s very easy to haul around.
Little guy carried that all around the camper sucking out bugs like a champ.
Also Read: Musty Camper Smell: how to get it out
Meanwhile, those countertops…
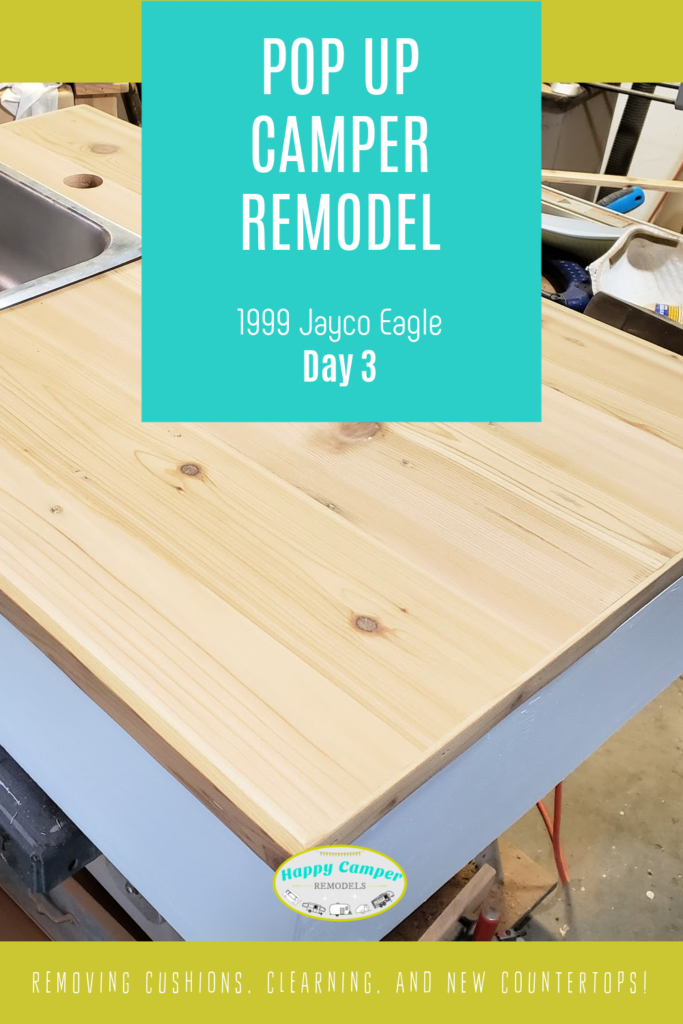
In another part of town, my dad was working on the new countertops for the portion by the door and the sink area. Check out the sad state before here!
Using reclaimed wood – usually from old deck boards – my dad makes all sorts of things. For the countertops, he’s piecing together some boards he’s planed off.
I got this photo from him. They are going to look so great!
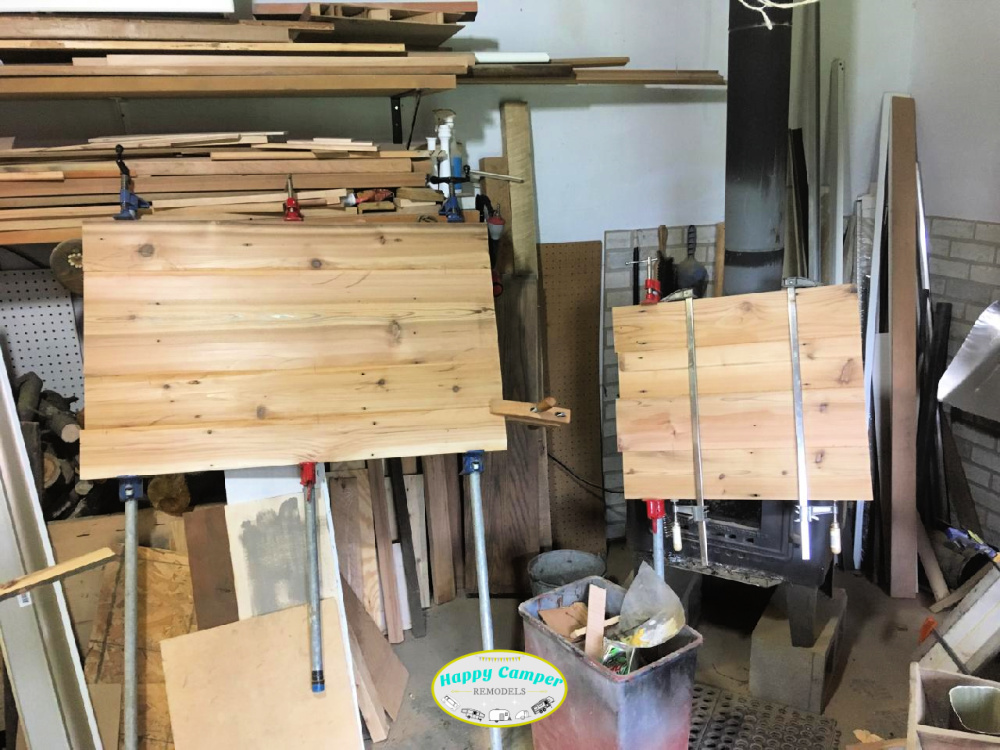
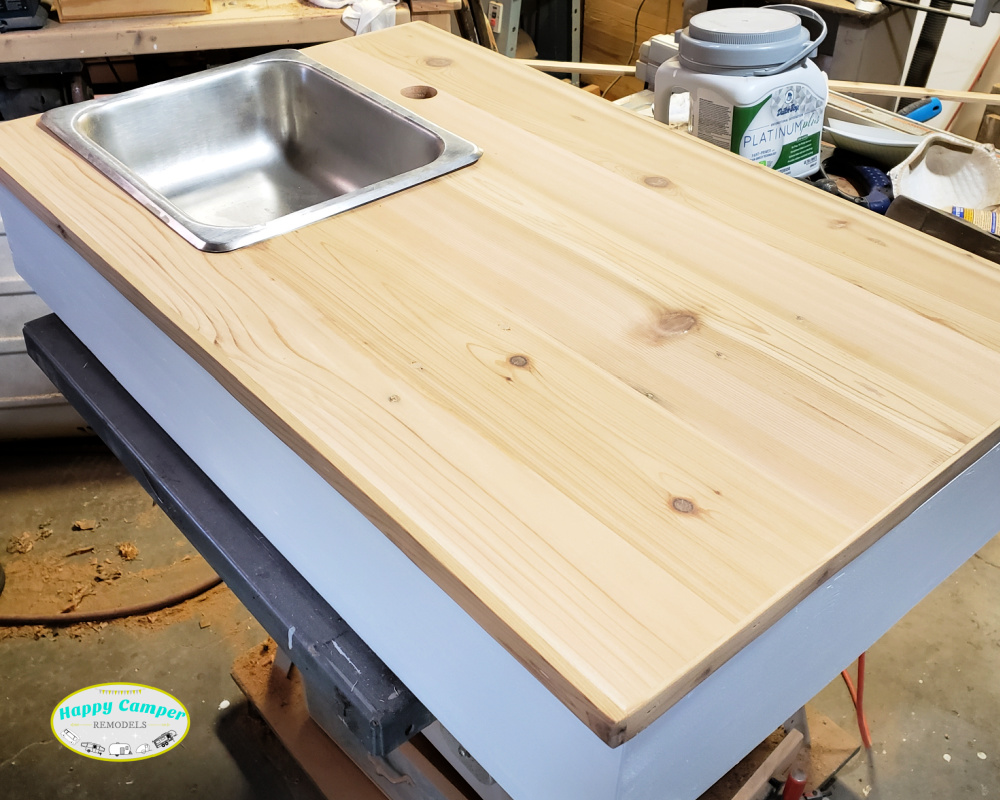
Then, because my dad is a machine and pounds out projects in no time, by the time we visited after our weekend at the cabin, it was already done!
No only did he piece the reclaimed wood together for the countertops, but he cut the hole, installed the sink, fabricated the new kitchen piece, and painted the new portion white!
It’s pretty insane how fast he is! Here is your sneak peek! It will be a while before it goes it, but it’s amazing!
Also Read: Outdoor Camper Kitchen Must-Haves
That was about it for Day 3
Not our biggest day with the camper, but a good bit of progress anyway.
Check out Day 2 of our pop up camper remodel diary
If you want that great before and after fix right now, check out our 1999 Viking pop up camper remodel before and after!
You can also find all our previous pop up camper posts over on Exploring Domesticity.
To see more of our current pop up camper remodel be sure to follow us on Instagram and check out the 1999 Jayco Pop Up highlights!
Pin to keep up with our progress!